The 2-Minute Rule for Compassdata Ground Control Points
Table of ContentsSee This Report about Compassdata Ground Control PointsThe smart Trick of Compassdata Ground Control Points That Nobody is DiscussingThe 25-Second Trick For Compassdata Ground Control PointsCompassdata Ground Control Points - An OverviewThe 5-Second Trick For Compassdata Ground Control PointsThe Ultimate Guide To Compassdata Ground Control Points
Save your scene File/Save Job (CTRL+S) and also conserve your sfm_data documents. Post-process or usage directly the point cloud to carry out steps. i. e below once MVS have actually been calculated we can gauge the eyes distance => = 5 centimeters.ini. The web content of the file should be 'MAXIMUM_DISTANCE_GCP=10. 0'. By transforming this criterion the new important distance will be used at reboot of the 3DM Material Manager. The imported GCP collaborates are presented as dots on the Map and Mapping Views. Brown (gold): criterion, GCP is not yet measured in mapping context.
ID's with timestamp: Number of one-of-a-kind GCP's connected to at the very least one trajectory incident. ID's without timestamp: Number of GCP's not linked to a trajectory incident.
Rumored Buzz on Compassdata Ground Control Points
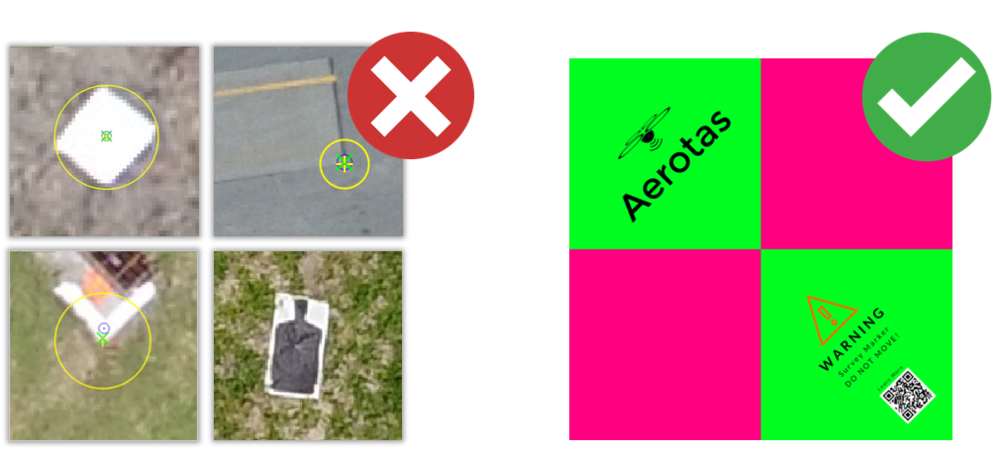
The GCP procedure function works exactly the very same as the existing 3D Dimension as well as Hover setups, see Dimensions. By identifying the rectangular marks width, length, neighborhood and also reflectivity worth, GCP's can be immediately found. Clear dimension of the in table picked gcp incidents. Erase the in table selected GCP events.
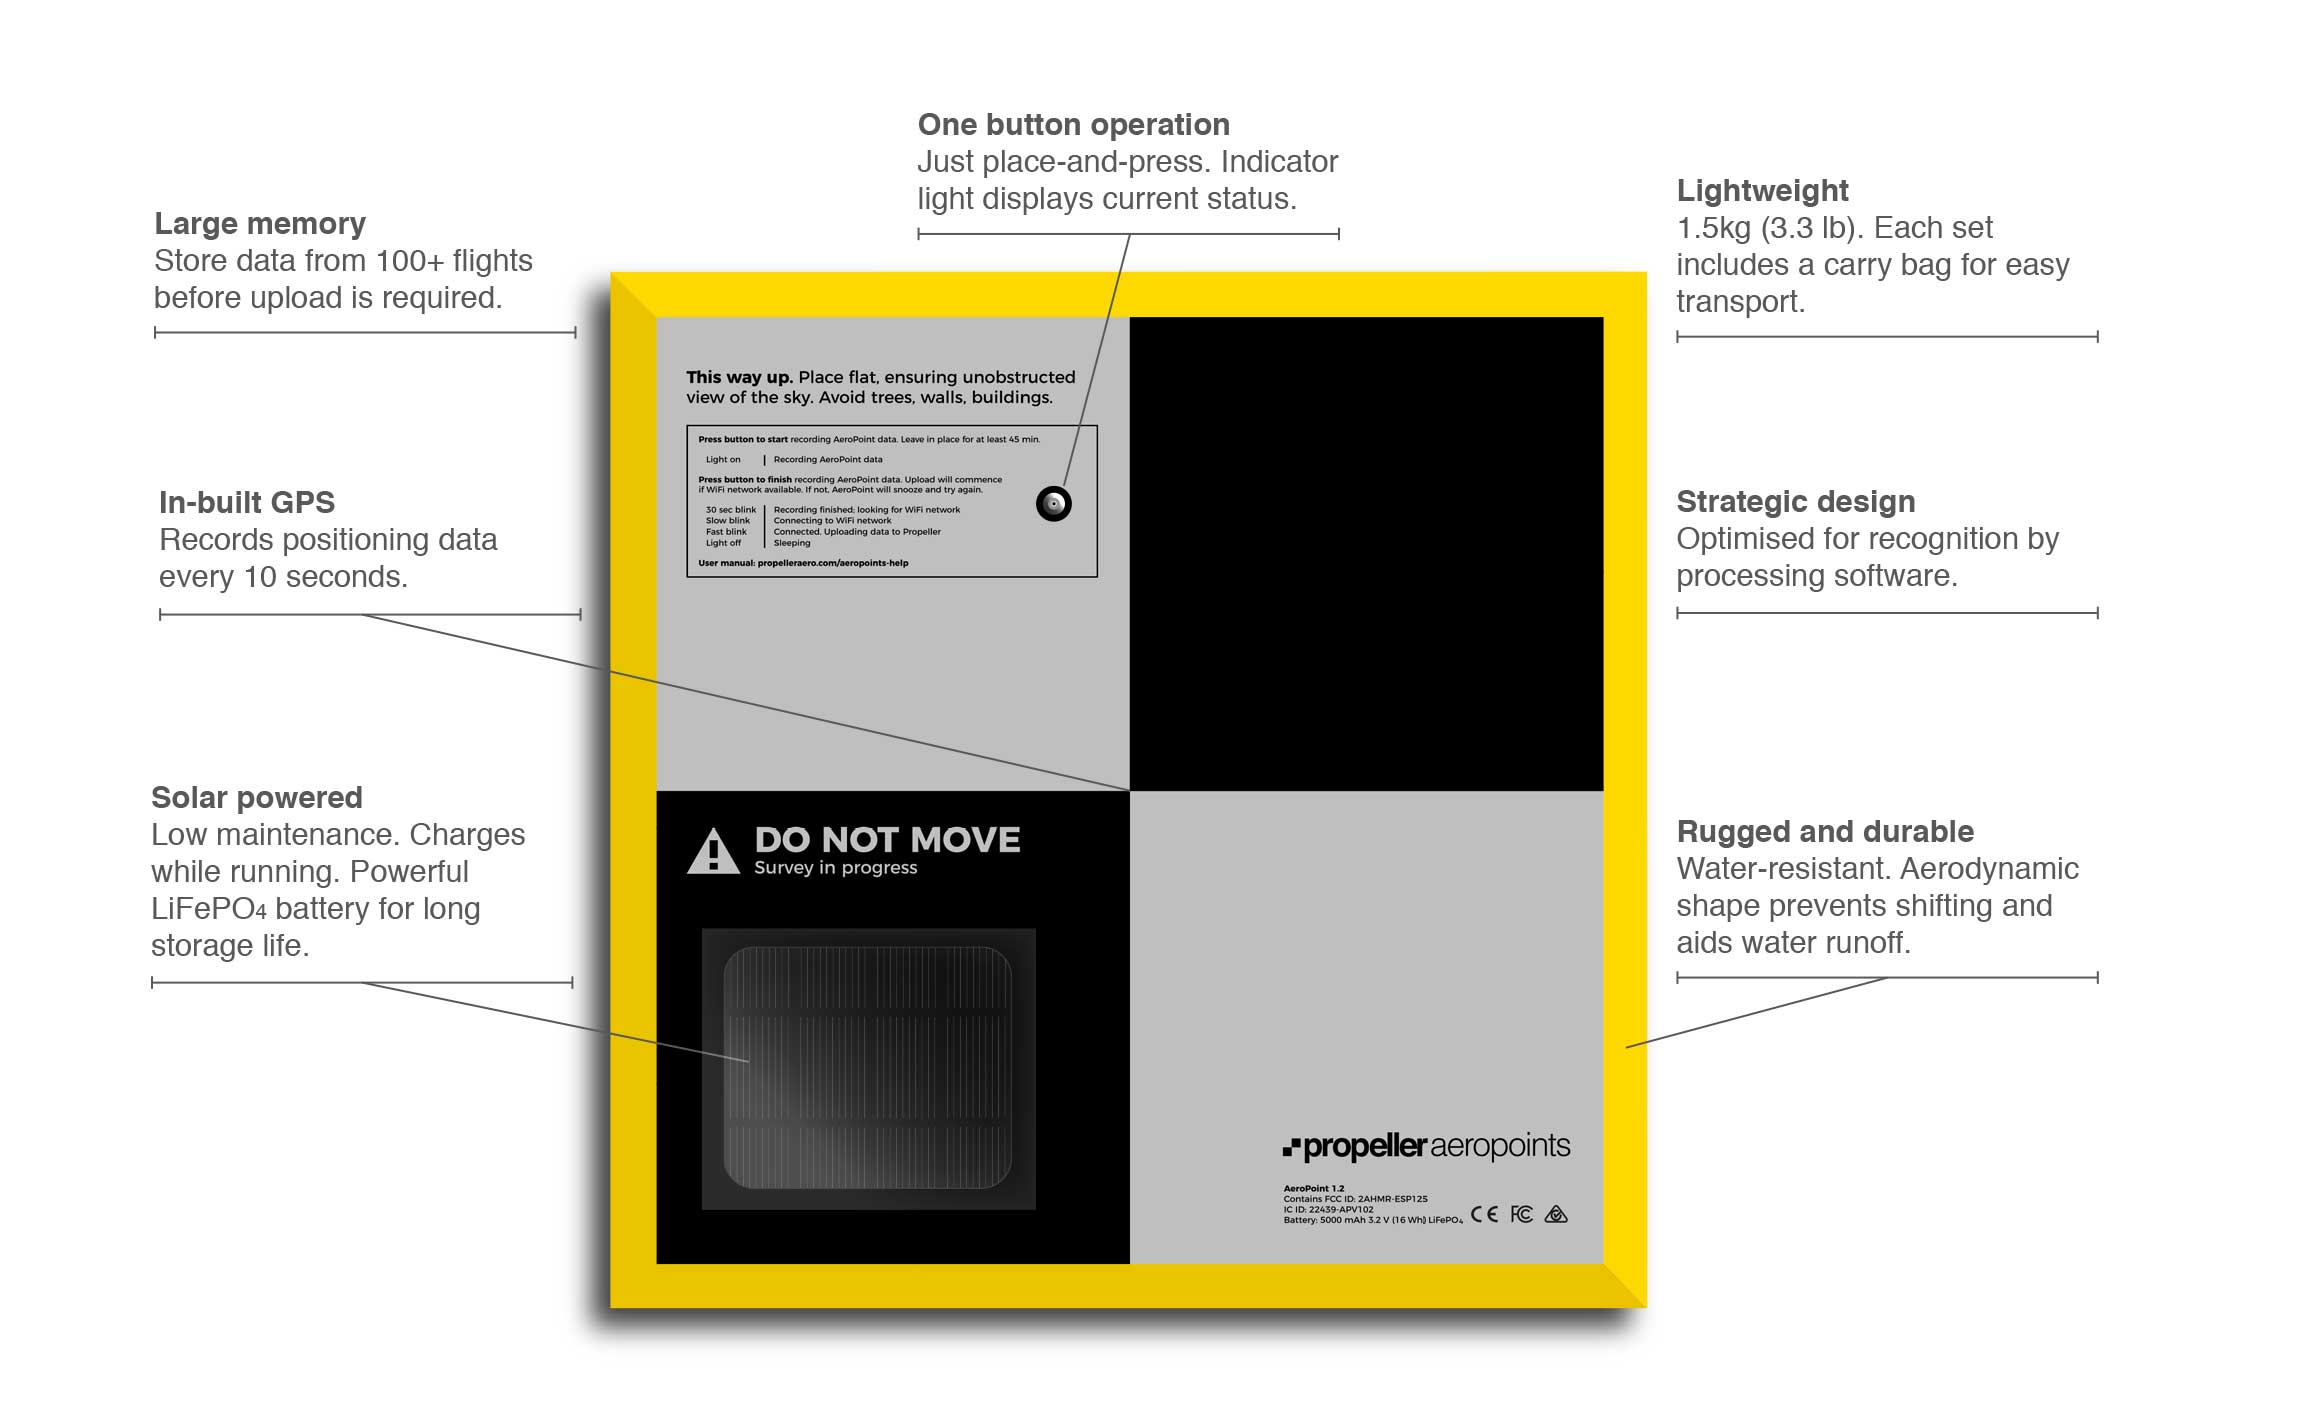
A ground control point (GCP) is a place or item with a well-known geographical place (or GENERAL PRACTITIONER coordinate) that can be utilized as a referral factor to deliver a specific airborne map for evaluating purposes. GCPs are built on the concept of tape-recording the setting of an object by calculating the range and also angles in between tactically chosen points. They must have centrepoints that are plainly defined., there are some ineffectiveness linked with the technique.
The smart Trick of Compassdata Ground Control Points That Nobody is Discussing
Enter ground control factors on the left side of the Pixels to Information tool dialog, below the picture list. Specify the x, y and also z place of the control points: To fill a collection of control points, right-click on the Ground Control Information area and pick Import Control Details From Loaded Factor Layer or Documents ...
switch on the appropriate side of the Pixels to Things Tool [BETA] dialog, under the picture preview. Go into the location of the Control Factor utilizing one of the choices in the Place section of the Ground visit our website Control Factor details dialog presented to the. Optionally specify the Elevation, name and customized icon to make use of for the Ground Control Factor (CompassData Ground Control Points).
Photos that likely have the ground control point place are highlighted in green. Click on the Image Preview to zoom in on the clicked area. When the Ground Control factor is located click over here now press the Include Control Factor to Image (CompassData Ground Control Points)... switch as well as click the Ground Control location on the input image sneak peek.
9 Easy Facts About Compassdata Ground Control Points Explained
, I to rt hcel nlcokcation is wrong, click the dot on the image to pick it. Drag to move the control point, or press the delete key to eliminate it. Full this procedure for every of the input pictures. Then include at the very least two even more Ground Control Information, and also situate them in each of the pictures.
To zoom the preview photo, situate the cursor over the part of the picture that is of rate of interest, and also roll the mouse wheel. The photo can also be zoomed by left-click and right-click of the mouse. A left-click will focus at the cursor place. A right-click will zoom out.
If a control factor has been contributed to the picture, it is selectable by left-clicking. The arrow while modification to an arrowhead when over the included point, permitting it to be chosen. A red box will show up around the point indicating its chosen state. Left-click as well as drag to move the selected control point.
What Does Compassdata Ground Control Points Mean?
Double-click the named point in the Ground Control Information checklist to bring this dialog back up for a currently added Ground Control factor. Call- Specify a name to recognize the ground control factors. Sign - This is the factor sign that will be presented on the image sneak peeks which contain this ground control point.
switch will certainly additionally be offered in the location section, only when there is data filled generally map view. Press the get rid of chosen button to eliminate the entire Ground Control Factor from the checklist of Ground Control factors. To get rid of the factor from just one input image, press the point click here now to choose it.
This switch lies under the Image Preview. Press this button to add a control factor to the current photo preview. It might be needed to first click on the image to zoom, or make use of the mouse wheel to focus on the picture preview. As soon as a point is contributed to the picture, it can be updated.
The Of Compassdata Ground Control Points